Below are some projects I did through class and contributed to the University of Illinois Engineering Wiki. You can click on the titles of any of the projects to be taken directly to the project's page to learn more about them. |
|


|
Intelligent Mobile Navigation
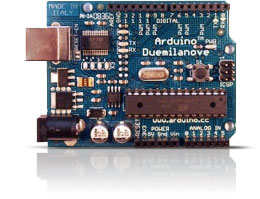
This is a list of projects I worked on as a part of Intelligent Mobile Navigation, a course on electronics, robotics, and intelligent design of machines I took at the University of Illinois.
The class made an important emphasis on designing equipment that was functional, easy to use, and well presented. I highly encourage you to check out all of the projects, because the students here came up with some very creative machines with plenty of practical applications. Entries are ordered from last to first. |
|
| |
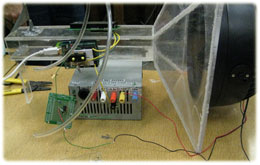
The “HAWT”, as we called it, was a wind tunnel that used the Arduino microcontroller to regulate a wind tunnel by entering a Reynolds Number (Re) instead of an airspeed or input power level. Most scale tests in aerospace use Re, so it made sense to have a system that allows us to test using the same parameter that we calculate and predict results with.
It worked well, and even though we only used a small fan this time around, this system can easily scale up. The Arduino is extremely responsive and with the right tools and a large enough power system this could be used in very large systems. We could even program the unit to choose parameters to decide the air speed inside the tunnel; we picked Re because it was the most recognizable and useful demonstration. I worked on programming, manufacturing, and auxiliary electronics for this project, and a power supply I built to do experiments on my own is actually the demonstration power system in the photos in this article. |
|
| |
The XBee Shield is a wireless antenna add-on for the Arduino. We used it to demonstrate distributed communication and demonstrated it by playing “Sharks and Minnows” as a class. The guide I made for the class ended up being adopted by NKE Electronics as the assembly guide for version 2 of this product. |
 |
| |
The mouse controller was a very simple alternative input device that used the XBee shield. As above, this was for the Sharks and Minnows game we were playing with the class. A lot of the other projects had very creative inputs, such as capacitive sensing, accelerometers, and others. You can see them all here (scroll down to “Make a networked object”). The focus for me on this was more interfacing with the mouse's connection than on the actual input itself. Understanding how the electronics worked later on would let me interface the Arduino to just about anything. |
|
| |
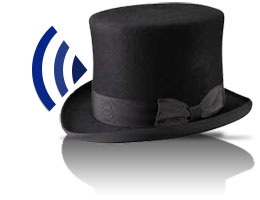
We used an ultrasonic range finder hidden in a hat to help the hard of sight ‘sense’ obstacles. It used a small motor which would vibrate at different intensities to indicate the proximity to an object ahead. The range could be set based on what we felt was ‘close enough’ and it can be used with light sensors, ultrasonic sensors, or really any appropriate sensor. The Arduino’s response time was fast enough to handle walking at normal speeds (even though the demonstration does not show this). |
 |
| |
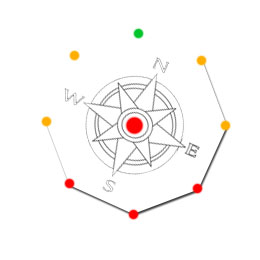
One of my favorites, we coupled a GPS and a digital compass to create a hand-held ‘wayfinder’. We could program in our destination coordinated into the Arduino, then using the digital compass to know its orientation, an array of LEDs would light up pointing in the direction of the destination. When you were in range of the target, all of the LEDs would light up to let you know you had arrived. |
 |
| |
This was a child’s toy (a rubber duck) that could be used as a night light OR as a way to tell if the temperature of, say, bath water was safe enough for your child. You input the temperature you want into the Arduino, and it would change color when the water became too hot. In the demonstration, I only demonstrate how it responds to light because doing a thermal demonstration would have taken too long. |
 |
| |
|
|
